Docker · General · GIT · Java · Mysql · Spring

Dockerize Microservice (SpringBoot RESTful Application with Mysql)

Statement : With the help of Docker, one can easily create, deploy and run their applications. So in this article, we’ll learn how one can deploy their Microserives (Spring Boot Application connected with Mysql Backend) to Docker Container.

Prerequisites : Please insure that Docker, Java, Mysql and mvn is installed on your machine. Now, please follow the below steps to dockerize your microservice –

  • Build your code : Maven is used as the build automation tool, so we need to build our code through the below command so that we can get the complete jar file having the actual application code with all the required dependencies.
mvn clean install
  • Create Dockerfile : Go to the root of the application where pom.xml is contained. Below is the content of my Dockerfile –
#Fetch the base Jav8 image
FROM java:8
#Expose the local application port
EXPOSE 8080
#Place the jar file to the docker location
ADD /target/microservicedemo-1.0-SNAPSHOT.jar microservicedemo-1.0-SNAPSHOT.jar
#Place the config file as a part of application
ADD src/main/resources/application.properties application.properties
#execute the application
ENTRYPOINT ["java","-jar","microservicedemo-1.0-SNAPSHOT.jar"]
  •  Go to Spring Boot applicaion.properties where you have mentioned the backend url in terms of mysql database.
spring.datasource.url = jdbc:mysql://localhost:3306/microservice
// Change the above url to the below one
spring.datasource.url = jdbc:mysql://mymicroservicesqldbdb:3306/microservice
  • When we run any application on Docker Container, we need to tell the existence of mysql backend if any with the help of docker networking. So, instead of running the mysql instance locally, we need to run one more docker container for mysql. For that, we need to create one network so that both the application and mysql docker container can talk to each other.
docker network create account-mysql
  • Spring Boot application has the requirement of connecting with Mysql instance, so firstly I need to run mysql container and I can pull that mysql image from docker hub directly.
docker container run --name mymicroservicesqldbdb --network account-mysql -e MYSQL_USER=demo -e MYSQL_PASSWORD=demo -e MYSQL_DATABASE=microservice -e MYSQL_ROOT_PASSWORD=root -d mysql:8
  • Build Docker Image : Now, it is the time to build the actual docker image.
docker build -f Dockerfile -t microservice .
  • Run the Docker Image :
docker run --network account-mysql -p 8000:8080 -t microservice

Option -p publishes or maps host system port 8000 (where you need to host the application like local machine) to container port 8080 (where your actual application code resides).

  • To find the details of your running container
$ docker ps
CONTAINER ID        IMAGE               COMMAND                  CREATED              STATUS              PORTS                    NAMES
fb15604af25b        microservice        "java -jar microserv…"   About a minute ago   Up About a minute   0.0.0.0:8000->8080/tcp   serene_chaplygin
d1609d184de5        mysql:8             "docker-entrypoint.s…"   55 minutes ago       Up 55 minutes       3306/tcp, 33060/tcp      mymicroservicesqldbdb

You can find the complete code in my github repository. Now you can test your REST APIs through the url http://localhost:8000 using any of the REST client . Hope it helps you to deckerize your microservice easily. 🙂

General · Interviews · Java

Coding Interview Cheat-Sheet/ FAAAMNG Preparation/ Smart Code Thinking/ Last Night Coding Interview Guide

Statement : Getting a job offer from FAAAMNG (Facebook, Adobe, Amazon, Apple, Microsoft, Netflix & Google) companies is like a dream comes true specially for IT guys working or want to work in the field of software development. Most of these top notch companies conduct 3 to 4 rounds of interviews based on the experience level of candidates and in that checking the problem solving skills & creative thinking in terms of coding round is must. Trust me, it is not the easy process to crack specially for those who are either not from CS/IT background or not having a tag of 1st tier colleges in India. Moreover, I have designed this article for all these kind of candidates who aim to get into not only FAAAMNG companies but few product based companies as well. In this, I have tried to cover few of the tips and tricks to crack the coding interviews. This article will not only guide you to think in terms of different approaches of solving the coding problems but give you the gist of existing set of commonly used Data Structures and Algorithms. Based on the interview process, I have already talked about the system design concepts in my previous article which are really very useful to start working with new projects/products in your college/company.

DS and Alogs Approaches covered as a part of this video :

• Arrays/Strings

o Sorting Algorithms (Insertion, Merge and Counting etc ) 
o Searching Algorithms (Linear, Binary Search and Extended Binary Search through 2 Pointers or Fast & Slow Pointers Approach) 
o Greedy Algorithms 
o Backtracking (Recursion) 
o Dynamic Programming Paradigm (Top-Down/Memoization & Buttom-Up/Tabulation) 
o Maths and Stats 
o Hashing (Array, Set, Table etc) 
o Bit Manipulation (Through XOR, OR, AND, NOT operator) 
o Sliding Window Mechanism (2 Pointers Approach) 

• Linked List

o Singly Linked-List 
o Doubly Linked-List 
o Circular Linked-List 

• Tree/Graph

o Depth First Search Algo (Implemented using Stack) 
o Breadth First Search Algo (Implemented through Queue) 
o Topological Sort Algo 

• Trie

Visual Flow-Chart of Coding Interview Cheat-Sheet

References :

https://leetcode.com/

https://hackernoon.com/

Finally, you are going to learn these approaches in my own way through my youtube video so that you can easily map the given set of problems with the appropriate data structure and algorithm. So, please like the video and share your valuable feedback. Last but not least, please don’t forget to subscribe my youtube channel. Cheers 🙂

Android · C# · Design · Design Patterns · General · Java · PHP · Python

Design patterns Construct

Statement : While working on the projects/problems, we end up solving it with any of the optimised approach and somehow we would have applied one of the known pattern in its design directly or indirectly. So, here I am gonna take care of understanding the few of the important and frequently used design patterns irrespective of any language.

Types of Design Patterns

Mainly, we have 3 types of patterns which are categorised as follows –

  1. Creational : Take cares of creating the objects in different ways.
  2. Structural : Takes care in organising structure (relationship) among classes and objects.
  3. Behavioral : Takes care of common communications among objects.
  • Factory Pattern
  • Abstract Factory Pattern
  • Singleton Pattern
  • Decorator Pattern
  • Proxy Pattern
  • Observer Pattern

Note* In the diagrams, suffix I stands for interface and C for class.

I haven’t covered all the design patterns in this post. I’ll try to cover few more in my upcoming post if required. I hope, you would have understood the geist of above commonly used patterns in daily life. Keep exploring and sharing 🙂

Java · Mysql

Lambda Magic in Java 8

Statement : While working on Java Projects, we have to use Java Collections very frequently and there we use to struggle trying to convert one data structure into another. But if you have gone through some of the magic done in Java8 through Lambda, things would be very handy and easy going.

Collections Overview :

First of all, Java Collection interface extends Iterator interface which means that Java Collection uses index to retrieve the elements  next element as well to check whether more element are present or not. So, Java Collection is broadly divided into there categories –

  • List : ArrayList, LinkedList, Stack etc [ORDERED, DUPLICATE]
  • Set : HashSet, LinkedHashSet, TreeSet [UNORDERED, UNIQUE]
  • Queue : DeQueue (Heap)

In addition to it, everyone see Map interface also as a part of Java Collection but this is not the fact. Even, Map doesn’t support index and depends key-value pair which is not iteratable and in turn it can’t extends Collection which further extends Iterable.

  • Map : HashMap, TreeMap, HashTable etc.

Lamda Magic on Collections :

  • List to Set Conversion
List<POJO> originalList = new ArrayList<>();
Set<GetterMethodReturnType> set = originalList.stream().map(pojoObject -> pojoObject.getterMethod())
.collect(Collectors.toSet());
# POJO can be Car, Address, PersonDetails etc which would be having some of the attritubes with their setter and getter methods. 
# GetterMethodReturnType is the return type of the method. For ex. String, Integer etc.
  • List to Map Conversion
Map<DataType,DataType> nameMap = originalList.stream()
.collect(Collectors.toMap(dataTypeRef -> dataTypeRef , dataTypeRef -> dataTypeRef.getterMethod()));
# DataType can be Integer, Long, String and any POJO itself.
# dataTypeRef cab be the instance of the DataType.
  • One List to Another List Conversion
List<GetterMethodReturnType> convertedList = originalList.stream()
.map(pojoObject -> pojoObject.getterMethod())
.collect(Collectors.toList());

Commonly Used Operations on Data :

In our algorithm, we have to use the aggregation operation very frequently and most of the time we end up writing the logic for the same. But Lambda solves this problem with 1 or 2 lines of code.

  • To get the sum of the elements
int sum = originalList.stream()
.collect(Collectors.summingInt(pojoObject -> pojoObject.getterMethod()));
  • To get the average of the elements
int average = originalList.stream()
.collect(Collectors.averagingInt(pojoObject -> pojoObject.getterMethod()));
  • To get the min/max of the elements
int max = originalList.stream()
.collect(Collectors.maxBy(Comparator.comparing(POJO::getterMethod)));
int min = originalList.stream()
.collect(Collectors.minBy(Comparator.comparing(POJO::getterMethod)));
  • To get the count all the related elements
int count = originalList.stream()
.filter(pojoObject -> filterCondition).collect(Collectors.counting());

In this post, I haven’t covered everything related to Lambda but tried to focus on the important aspects of it. Enjoy coding 🙂 Cheers !!

Airflow · Java · Linux · MAC · Spring · Windows

Understanding of Airflow Pools

Introduction

Apache Airflow has been adopted very rapidly. With the increasing popularity of the multi tenant system, clusters are added very frequently. The reason for adding the new cluster (shared or dedicated) is because of the restriction on the number of running tasks on any cluster concurrently. Even if we add the new cluster, we don’t have any fine grained restriction to avoid bombarding on the same and in turn we do have a problem of queuing up our E2E. Right now, Standard VM based clusters and AKS backed clusters have maximum concurrency of 50 and 650 respectively, recently we have been constantly observing that number of running tasks are reaching this concurrency and this is blocking our periodic E2E or clients using shared cluster to get queued for a longer and eventually our E2E’s are getting unstable as they are not able to complete in stipulated time. On this note, we have realised the need for adopting the airflow pools. Airflow Pools are configurable via the Airflow UI and are used to limit the parallelism on any particular set of tasks. You could use it to give some tasks priority over others, or to put a cap on execution for things like hitting a third party API that has rate limits on it.

Use of  Pools

Finally, pools are a way of limiting the number of concurrent instances of a specific type of task. This is great if you have a lot of workers in parallel, but you don’t want to overwhelm a source or destination.

For example, with the default airflow config settings, and a DAG with 50 tasks to pull data from a REST API, when the DAG starts, you would get 16 workers hitting the API at once and you may get some throttling errors back from your API. You can create a pool and give it a limit of 5. Then assign all of the tasks to that pool. Even though you have plenty of free workers, only 5 will run at one time.

You can create a pool directly in the Admin section of the Airflow web UI

Screen Shot 2020-05-09 at 4.28.52 PM

Implementation Approach

We wanted an approach for the best utilisation of resources which means if we start enforcing pools, let’s say Client A &  B with limits 30 & 20 respectively and default pool size is 128 for non-pooled clients, then following should be possible.

  • Non-Pooled tasks are 50, Client A has 30 & Client B has 20 tasks to run – All tasks will start running
  • Non-Pooled tasks are 150, Client A has 35 & Client B has 25 tasks to run – 30 tasks of Client A & 20 tasks of B and 128 non-pooled will start running.
  • Non-Pooled tasks are 150 & Client B has 5 tasks to run –  5 tasks of B and 128 non-pooled will start running.

Another problem we have is existing DAGs which are not pooled. So we can implement client level pools only on new clusters we will provision. But E2E can always be put under a pool(let say, e2e_pool of size 5).So with this we can say default_pool size is 50 and e2e_pool is 5, so in this scenario, our E2E won’t be waiting for the slot as long as we have 5 e2e.

Provision of Pools through DAG

run_bash_job = BashOperator(
    task_id='test_task_1', bash_command='echo 1 && sleep 1400m', retries=3,
            retry_delay=timedelta(seconds=300), pool='test-client', dag=dag)


run_spark_job = SparkOperator(
    json={"name":"HelloWorld","sparkConf":{},"envVars":{},"className":"HelloWorld",
          "jar":"https://xyz.com/artifactory/hello.jar",
          "args":["/usr/local/spark/README.md"],"driverMemory":1024,"driverCores":1,"executorMemory":1024,"executorCores":2,"numExecutors":1},
                  retries=1,retry_delay=timedelta(seconds=5),task_id='Spark_0_TrainingJob',pool='test',dag=dag)

run_bash_job.set_upstream(run_compute_job)

The pool parameter can be used in conjunction with priority_weight to define priorities in the queue, and which tasks get executed first as slots open up in the pool. The default priority_weight is 1, and can be bumped to any number. When sorting the queue to evaluate which task should be executed next, we use the priority_weight, summed up with all of the priority_weight values from tasks downstream from this task. You can use this to bump a specific important task and the whole path to that task gets prioritised accordingly.

Tasks will be scheduled as usual while the slots fill up. Once capacity is reached, runnable tasks get queued and their state will show as such in the UI. As slots free up, queued tasks start running based on the priority_weight (of the task and its descendants).

Note that if tasks are not given a pool, they are assigned to a default pool default_pooldefault_pool is initialised with 128 slots and can changed through the UI or CLI (though it cannot be removed).

Pools APIs

As detailed above, DAGs may need to run in the dedicated pools and in turn associated clients would need to know about them. But for time being, we will not give this flexibility of utilising the CRUD pool to any of our client instead the service admin will do this on behalf of them. We plan to encapsulate such entities in Pools. Some Pools may be created as a part of bootstrapping of the service itself.

API Name

URI

Payload

Comments

Response

Create a new Pool on any cluster
POST
/clusters/{clusterId}/pools

JSON Payload containing Pool details

{
“pool_name” : “test_pool”,
“slots” : 100,
“pool_desc” : “test_pool”
}

{clusterId} – id of the cluster where you want to
create a pool.

201 Created

Location: @/pools/{clusterId}/test_pool
Retrieve all the pools details of the associated cluster
GET
/clusters/{clusterId}/pools
NA {clusterId} – id of the cluster from where you want to retrieve the details of all created pool.

200 OK

{
“airflowPools”: [
{
“poolDescription”: “Default pool”,
“poolName”: “default_pool”,
“poolSlots”: 128
},
{
“poolDescription”: “test_pool”,
“poolName”: “test_pool”,
“poolSlots”: 100
}
]
}

Retrieve specific pool details of the associated cluster
GET
/clusters/{clusterId}/pools/{poolName}
NA {poolName} – name of the pool which you want to retrieve details about 200 OK

{
“poolDescription”: “test_pool”,
“poolName”: “test_pool”,
“poolSlots”: 100
}

Delete cluster’s specific pool
DELETE
/clusters/{clusterId}/pools/{poolName}
NA {poolName} – name of the pool which you want to delete 204 No Content

Cluster Costing Based on the allotted pool slots

In the current system, we have two types of clusters either shared or dedicated based on the client’s need (in terms of concurrency). So costing would vary based on the following assumptions –

  • In case of dedicated cluster, the whole cost of the cluster will incur by the client because all the associated resources will be used for them only.
  • In case of shared clusters, we have following possibilities of costing assuming there are 3 clients using the same cluster having the concurrency cap of 50 and cluster cost of 1500 dollars.
Possibility :1
Slots alloted By Admin
Incurred Cost ($)
Cost Formula
Calculation
Comments
Client A 17 500 Total Cost / Number of Clients 1500/3
  • Equals slots are provided to all the customers.
Client B 17 500 SAME AS ABVOVE 1500/3
  • Individual Used slots are not taken into consideration.
Client C 17 500 SAME AS ABVOVE 1500/3
  • Totally Concurrency is not taken into consideration.
Possibility:2
Slots ASK
Incurred Cost ($)
Cost Formula
Calculation
Comments
Client A 10 600 (Total Cost / Total Used Slots) * Slots ASK (1500 / 25 )*10
  • Slots are provided based on the requirements
Client B 10 600 SAME AS ABVOVE (1500 / 25 )*10
  • Totally Concurrency is not taken into consideration.
Client C 5 300 SAME AS ABVOVE (1500 / 25)*5
Possibility:3
Slots ASK
Incurred Cost ($)
Utilised Cluster Cost Formula
Un-Utilised Cluster Cost Formula
Cost Formula
Calculation
Comments
Possibility:3
Slots ASK
Incurred Cost ($)
Utilised Cluster Cost Formula
Un-Utilised Cluster Cost Formula
Cost Formula
Calculation
Comments
Client A 10 550 (Total Cost / Total Slots) * Slots ASK ((Total Cost / Total Slots) * Total Unused Slots) / Number of Clients Utilised Cost + Un-utilised Cost (1500/50)*10 + ((1500/50)*(50-25))/3
  • Un-utilised Cost will be same for all the clients.
Client B 10 550 SAME AS ABVOVE SAME AS ABVOVE SAME AS ABOVE (1500/50)*10 + ((1500/50)*(50-25))/3
  • Everything (Totally Concurrency, Individual Used slots) is taken into consideration.
Client C 5 400 SAME AS ABVOVE SAME AS ABVOVE SAME AS ABOVE (1500/50)*5 + ((1500/50)*(50-25))/3

Conclusion

With the implementation of pools (first class object provided by Airflow) in service API, we will be able to solve the problem of running fixed number of E2E in any cluster with out waiting for the open slots. More than that, we will be able to allot fixed number of slots to the different clients who wants to run few jobs in the shared cluster.

General · Java · Spring

Throttling and Quota Management

Statement

With the initiative of Company’s API-First approach, Service is moving faster towards Self-Service mode.  In this world of APIs, there is no limit to access your resources henceforth in the interest of developers and customers, We have decided to limit the access to POS APIs. And that’s how the idea of throttling and user quota came into picture and we want to implement the same in Service.

API Throttling

  • API Throttling is a way by which we can control on the usage of APIs by different clients and developers.
  • Generally it is measured in terms of Requests per Sec/Minute/Hour/Day/Week/Month/Year etc.
  • One can associate the throttling on behalf of Request Type (POST/PUT/GET), API end point etc.
  • When the configures limit is exceeded, user gets message saying “Too many requests” with Response status code as 429.

There are mainly 2 types of throttling :

Soft: In this type, when the number of API requests exceeds the configured percentage of throttle limit (70 or 80), service is supposed to send the alert to the user.

Hard: In this type, the number of API requests can’t exceed the configured threshold limit.

In the Dropwizard application, we can implement the same using RateLimiter Class or @Throttling annotation. This mechanism is designed to have very low overhead, counts the number of requests made with the token in the throttling time period and compares this with the allowed number of requests. If an access token is throttled, requests using it are denied access until a full throttling period passes, after which it can begin accessing the API again with zero throttling count.

User Quota Management 

  • User Quota is somewhat similar to the API Throttling but applies to the collection of client keys like x-api-key.
  • The quota limit varies from client to client depending on their load and requirements.
  • Once quota is full, it requires an automatic or manual reset to allow any subsequent requests with a given API key.
  •  it is also measured in terms of Requests per Sec/Minute/Hour/Day/Week/Month/Year etc.
  • Generally when both the quota and throttling are configured for a client, API Gateway first applies throttling conditions, and based on whether the request was successful, increases the quota count for the API key.

Monitoring and Alerting

Once Throttling and User Quota is enabled in service, we can push these metrics through Observability and same can be seen on the Grafana Dashboards. There, we can can have alerting mechanism in the form of mail/slack when certain throttling or quota limit is exceeded for the clients.

Note* Companies have its own throttling policies. So as soon as request is made on the application, it is firstly routed through company’s gateway and certain throttling rules are applied there only. Application API throttling policies will fall after comapany’s throttling policies.

Airflow · Java · Linux · MAC · Mysql · Python · Uncategorized

Airflow UI authentication through ldap server

Statement

In the current system, Airflow UI is accessible to everyone and in turn it is very difficult to track any action (mainly write transactions) performed through UI. There is a high probably of messing with the system in case workflows are triggered/ deleted through UI only.  So then we have realised a need of authenticate the UI through ldap. This mechanism will authenticate the user’s credentials against a LDAP server. Apache Airflow introduced a role-based access control (RBAC) feature in 1.10. This feature built the foundation to improve Airflow UI security. However, the RBAC feature comes with its own limitations as it only supports five static role types.

Pre-requisites

We need the details of LDAP server where we need one account to use as the bind account. In this, I am using my ldap credentials for the binding purpose. You need to create the proxy user to perform this action. Moreover, I am using the below LDAP Server settings –

KEY VALUE Comments
AUTH_LDAP_SERVER

ldaps://ldap.xxx.yyy.net:636

Create your own LDAP server.
AUTH_LDAP_SEARCH

ou=Users,o=corp

AUTH_LDAP_BIND_USER

cn=<proxy_user>,ou=Users,o=corp

Create the proxy user instead of using any personal user.
AUTH_LDAP_BIND_PASSWORD ‘REPLACE_YOUR_LDAP_PASSWORD’ It’ll be replace by proxy user’s password.
AUTH_LDAP_UID_FIELD uid
AUTH_LDAP_ALLOW_SELF_SIGNED

True

Make it false in case we use ldap server’s certificate.
AUTH_LDAP_USE_TLS False
AUTH_LDAP_TLS_CACERTFILE

/etc/ssl/certs/ldap_ca.crt

Refer this to create self signed certificate.

Changes required at application side

  1. To turn on LDAP authentication firstly modify airflow.cfg to remove the existing LDAP configuration, if it exists. This can be done by simply removing the values to the right of the equal sign under [ldap] in the airflow.cfg configuration file. Alternately, the [ldap] section can be removed.
  2. Next, modify airflow.cfg to add rbac = true and to remove ‘authentication = True’, under the [webserver] section (We can control this through env variable (AIRFLOW__WEBSERVER__RBAC=true). Also, remove the authentication backend line, if it exists.
  3. And finally, create a webserver_config.py file in the AIRFLOW_HOME directory (this is where airflow.cfg is also located) and it has all the LDP credentials.

    import os

    from airflow import configuration as conf

    from flask_appbuilder.security.manager import AUTH_LDAP

    basedir = os.path.abspath(os.path.dirname(__file__))

    SQLALCHEMY_DATABASE_URI = conf.get(‘core’, ‘SQL_ALCHEMY_CONN’)

    CSRF_ENABLED = True

    AUTH_TYPE = AUTH_LDAP

    AUTH_ROLE_ADMIN = ‘Admin’

    AUTH_USER_REGISTRATION = True

    AUTH_USER_REGISTRATION_ROLE = “Admin”

    AUTH_LDAP_SERVER = ‘ldaps://ldap.xxx.yyy.net:636

    AUTH_LDAP_SEARCH = “ou=Users,o=corp”

    AUTH_LDAP_BIND_USER = ‘cn=ldap-proxy,ou=Users,o=corp’

    AUTH_LDAP_BIND_PASSWORD = ‘YOUR_PASSWORD’

    AUTH_LDAP_UID_FIELD = ‘uid’

    AUTH_LDAP_USE_TLS = False

    AUTH_LDAP_ALLOW_SELF_SIGNED = False

    AUTH_LDAP_TLS_CACERTFILE = ‘/etc/ssl/certs/ldap.crt’

  4. Note that this requires a valid CA certificate in the location specified to verify the SSL certificate given by LDAP server. We can also use the self signed certificate and for that we need to use the above mentioned setting  AUTH_LDAP_ALLOW_SELF_SIGNED as TRUE in pre-requisites.

RBAC UI Security

Prior to 1.10, Airflow was built upon the flask-admin framework, which did not provide any access control functionality. In 1.10, Airflow switched over to Flask-Appbuilder (FAB), which provided the necessary security features to support RBAC. Security of Airflow Webserver UI when running with rbac=True in the config is handled by Flask AppBuilder (FAB). Airflow’s DAG level access feature was introduced in Airflow 1.10.2 with additional enhancement in 1.10.3.

FAB Internals

FAB is web-based framework built on top of Flask, including security modeling, auto CRUD generation, and integration with different authentication mechanisms. It has a built-in security manager which is instantiated by the app to handle security operations.

Airflow RBAC Roles

Airflow ships with a set of roles by default: Admin, User, Op, Viewer, and Public. Only Admin users could configure/alter the permissions for other roles. But it is not recommended that Admin users alter these default roles in any way by removing or adding permissions to these roles.

Admin

Admin users have all possible permissions, including granting or revoking permissions from other users. We will be keeping this roles for few of us if required.

Public

Public users (anonymous) don’t have any permissions. These are not non authenticated users.

Viewer

Viewer users have limited viewer permissions who have read access to DAGs, but cannot modify the state of Airflow metastore. Rest of the users/clients will fall in this category.

VIEWER_PERMS = {
    'menu_access',
    'can_index',
    'can_list',
    'can_show',
    'can_chart',
    'can_dag_stats',
    'can_dag_details',
    'can_task_stats',
    'can_code',
    'can_log',
    'can_get_logs_with_metadata',
    'can_tries',
    'can_graph',
    'can_tree',
    'can_task',
    'can_task_instances',
    'can_xcom',
    'can_gantt',
    'can_landing_times',
    'can_duration',
    'can_blocked',
    'can_rendered',
    'can_pickle_info',
    'can_version',
}

on limited web views

VIEWER_VMS = {
    'Airflow',
    'DagModelView',
    'Browse',
    'DAG Runs',
    'DagRunModelView',
    'Task Instances',
    'TaskInstanceModelView',
    'SLA Misses',
    'SlaMissModelView',
    'Jobs',
    'JobModelView',
    'Logs',
    'LogModelView',
    'Docs',
    'Documentation',
    'GitHub',
    'About',
    'Version',
    'VersionView',
}

User

User users have Viewer permissions plus additional user permissions

USER_PERMS = {
    'can_dagrun_clear',
    'can_run',
    'can_trigger',
    'can_add',
    'can_edit',
    'can_delete',
    'can_paused',
    'can_refresh',
    'can_success',
    'muldelete',
    'set_failed',
    'set_running',
    'set_success',
    'clear',
    'can_clear',
}

on User web views which is the same as Viewer web views.

Op

Op users have User permissions plus additional op permissions

OP_PERMS = {
    'can_conf',
    'can_varimport',
}

on User web views plus these additional op web views

OP_VMS = {
    'Admin',
    'Configurations',
    'ConfigurationView',
    'Connections',
    'ConnectionModelView',
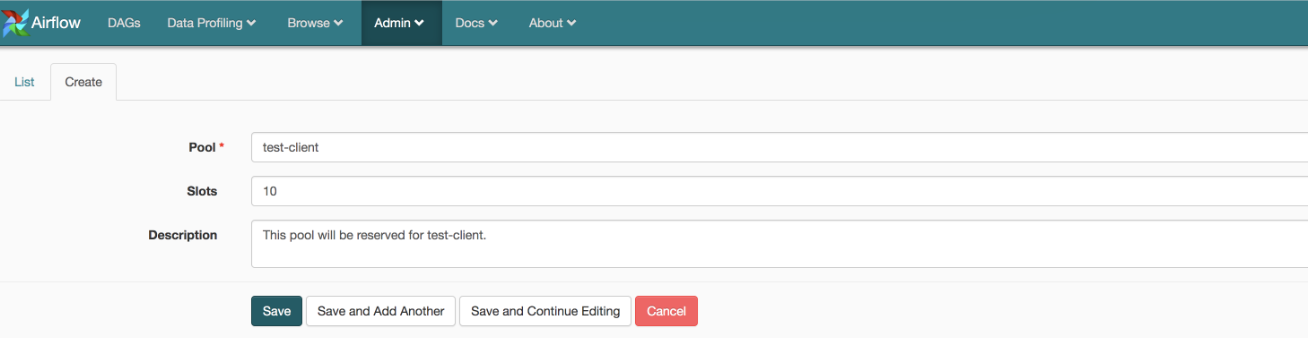
    'Pools',
    'PoolModelView',
    'Variables',
    'VariableModelView',
    'XComs',
    'XComModelView',
}

Custom Roles

DAG Level Role

Admin can create a set of roles which are only allowed to view a certain set of dags. This is called DAG level access. Each dag defined in the dag model table is treated as a View which has two permissions associated with it (can_dag_read and can_dag_edit). There is a special view called all_dags which allows the role to access all the dags. The default AdminViewerUserOproles can all access all_dags view. We need to investigate to how to integrate thisb feature into the application.

Note* I have tested this with Airflow 1.10.2, 1.10.5 and 1.106 and this is working perfectly.

General · GIT · Java · Jersey · Linux · MAC · Spring · Windows

Host your application on the Internet

Statement : The sole purpose of this post is to learn how to host your application to the Internet so that anyone can access it across the world.

Solution :

  • Sign up for the heroku account.
  • Download heroku cli to host you application from your local terminal.
  • Login to your account by using id and password through terminal by using below command –

heroku login

  • Create a new repo on your github account.
  • Now clone your repo on your local machine using the below command –

git clone https://github.com/guptakumartanuj/Cryptocurrency-Concierge.git

  • It’s time to develop your application. Once it is done, push your whole code to your github repo by using below commands –
  1. tangupta-mbp:Cryptocurrency-Concierge tangupta$ git add .
  2. tangupta-mbp:Cryptocurrency-Concierge tangupta$ git commit -m “First commit of cryptocurrency Concierge””
  3. tangupta-mbp:Cryptocurrency-Concierge tangupta$ git push
  • Now you are ready to crate a heroku app. Use the below command for the same –
cd ~/workingDir
$ heroku create
Creating app... done, ⬢ any-random-name
https://any-random-name.herokuapp.com/ | https://git.heroku.com/any-random-name.git
  • Now commit you application to heroku using the below command –

tangupta-mbp:Cryptocurrency-Concierge tangupta$ git push heroku master

  • It’s time to access your hosted application using the above highlighted url. But most probably you won’t be able to access the same. Make sure one instance of your hosted application is running. Use the below command to do the same –

heroku ps:scale web=1

  • In case, you are getting the below error while running the above command, then you need to make one file name Procfile with no extension and add the same to git repo. Then you need to push the repo to heroku again.

Scaling dynos… !

    Couldn’t find that process type.

  • In my case, to run my spring boot application, I have added the following command in the Procfile to run the application.

          web: java $JAVA_OPTS -Dserver.port=$PORT -jar target/*.war

  • Finally your application should be up and running. In case, you are facing any issues while pushing or running your application, you can check the heroku logs which will help you to troubleshoot the issue by using below commands-

heroku logs –tail

Enjoy coding and Happy Learning 🙂 


Document DB · Java

Pagination Support in DocumentDb using java SDK API

Statement : The sole purpose of this post is to implement the pagination in your application using Document Db java SDK API.

Solution :

  1. First you need to create the object of the FeedOptions by setting the page size (in my case I have taken it as 10) using the below snippet –

final FeedOptions feedOptions = new FeedOptions();

        feedOptions.setPageSize(10);

  1. Now you need to get the data using  queryDocuments() api of JAVA SDK passing the above feedOptions in this api’s arguments –

FeedResponse<Document> feedResults = documentClient.queryDocuments(collectionLink, queryString, feedOptions);

  1. This is the main step which helps you to get the page response as per the set limit of the page. Now to make it happen, continuation token comes into the picture. Use the below snippet to get the continuation token which can be used for pagination for the future calls given below –

String continuationToken = feedResults.getResponseContinuation();

  1. So, by using the above token we can make the next call –

List<Document> finalRes = new ArrayList<Document>();

boolean nextFlag= false;

if (feedResults != null) {

                if ((docs = feedResults.getQueryIterable().fetchNextBlock()) != null ) { 

                    for (Document doc : docs) {

                        finalRes.add(doc.toJson());

                    }

                    if (feedResults.getQueryIterable().iterator().hasNext()) {

                        nextFlag = true;

                    }

                }

            }

I hope this helps you to add the support of pagination in your application. Keep in mind, this only works on the single partition. In case of cross partition, continuation token does not work as it has the range component and in turn it will return you the null token in case of cross partition query. Enjoy coding 🙂


GIT · Grizzly · Java · Jersey · Swagger

Implement secure HTTP server using Grizzly and Jersey

Statement : The purpose of this post is to implement secure HTTP server using Grizzly and Jersey.

Solution :

  • First you just need to create the keystore and truststore files using the below commands and this will ask you certain details about your organization and all –

keytool -genkey -keyalg RSA -keystore ./keystore_client -alias clientKey
keytool -export -alias clientKey -rfc -keystore ./keystore_client > ./client.cert
keytool -import -alias clientCert -file ./client.cert -keystore ./truststore_server

keytool -genkey -keyalg RSA -keystore ./keystore_server -alias serverKey
keytool -export -alias serverKey -rfc -keystore ./keystore_server > ./server.cert
keytool -import -alias serverCert -file ./server.cert -keystore ./truststore_client

  • Add the SSLContextConfiguration Object (containing the details about the keystore and truststore files) in the constructor of GrizzlyHttpServerFactory as per the given below code –

    private static final String KEYSTORE_LOC = “keystore_server”;

    private static final String KEYSTORE_PASS = “123456”;

    private static final String TRUSTSTORE_LOC = “truststore_server”;

    private static final String TRUSTSTORE_PASS = “123456”;

    SSLContextConfigurator sslCon = new SSLContextConfigurator();

        sslCon.setKeyStoreFile(KEYSTORE_LOC);

        sslCon.setKeyStorePass(KEYSTORE_PASS);

        sslCon.setTrustStoreFile(TRUSTSTORE_LOC);

        sslCon.setTrustStorePass(TRUSTSTORE_PASS);

URI BASE_URI = URI.create(http://0.0.0.0:&#8221; + config.getPort());

        String resources = “com.secure.server.main”;

        BeanConfig beanConfig = new BeanConfig();

        beanConfig.setVersion(“1.0.1”);

        beanConfig.setSchemes(new String[] { “https” });

        beanConfig.setBasePath(“”);

        beanConfig.setResourcePackage(resources);

        beanConfig.setScan(true);

        final ResourceConfig rc = new ResourceConfig();

        rc.packages(resources);

        rc.register(io.swagger.jaxrs.listing.ApiListingResource.class);

        rc.register(io.swagger.jaxrs.listing.SwaggerSerializers.class);

        rc.register(JacksonFeature.class);

        rc.register(JacksonJsonProvider.class);

        rc.register(new CrossDomainFilter());

    return GrizzlyHttpServerFactory.createHttpServer(BASE_URI, rc, true,

new SSLEngineConfigurator(sslCon).setClientMode(false).setNeedClientAuth(false);

  • Job is done. Now you just need to integrate all the code together. You can refer my github link to get the full code of the implementation. Happy coding 🙂